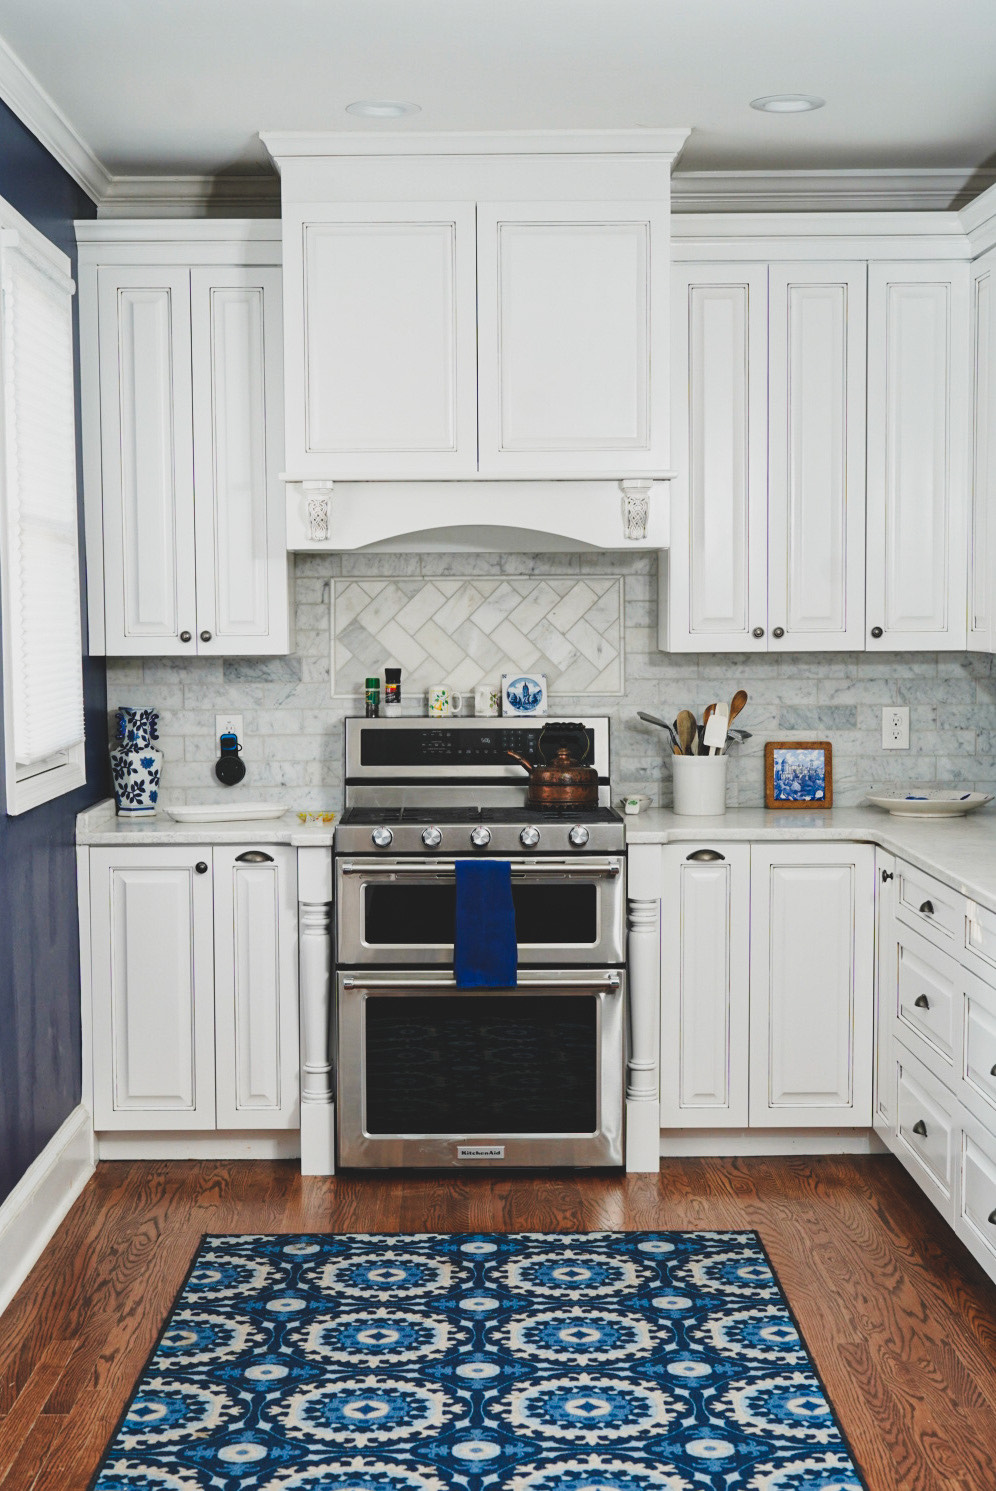
Are you tired of your outdated kitchen but don’t want to break the bank on a complete remodel? You’re not alone. Many people dream of having a fresh and modern kitchen, but are intimidated by the cost and time it takes for a complete overhaul. The good news is, there’s no need to spend thousands or wait months for contractors when you can give your kitchen an affordable refresh in just one week.
In this guide, we’ll walk you through each step of the process, from planning and designing to adding final touches. With some effort, creativity, and strategic budgeting, you’ll see how easy it is to transform your space in seven days without emptying your wallet.
We’ll provide tips and tricks on how to declutter effectively, choose paint colors that will improve the aesthetics of your cabinets and walls, update hardware and fixtures for a sleek look, add backsplash for a touch of elegance, and incorporate new accessories for functionality and style. So let’s roll up our sleeves and get started on refreshing your kitchen on a budget!
Day One: Planning and Designing
Let’s kick off day one with some fun planning and designing – who said revamping your kitchen on a budget couldn’t be exciting? Start by finding design inspiration. Browse through interior design magazines, websites, or apps to gather ideas that align with your vision. Save pictures of kitchens you love and note down elements you’d like to incorporate in your own space. Remember, it’s okay to borrow ideas from multiple sources to create a unique blend that reflects your style and personality.
Now onto the nitty-gritty – budgeting. It’s essential not to skip this step because it’ll guide all your future decisions. Use online budgeting tools which are free and user-friendly for organizing expenses. These handy tools allow you to input costs for everything from paint, tiles, cabinets to fixtures so you can track spending efficiently. Be realistic about what you can afford; remember, refreshing doesn’t mean replacing everything! The goal is smart improvements that pack a big punch without draining your wallet.
Day Two: Decluttering the Space
On the second day, it’s time to declutter and breathe new life into your space. Don’t be overwhelmed by the task; instead, use proven organizing techniques to streamline the process. Start by emptying all your cabinets and drawers, then sort everything into three piles: keep, donate or sell, and trash. Be ruthless in your decisions – if you haven’t used something in over a year or it doesn’t serve a purpose anymore, let it go. Use drawer dividers for utensils and other small items to keep them neat and easy to find.
Minimizing waste is also an essential part of decluttering. Consider donating unused or gently used items to local charity shops or selling them online rather than sending them straight to the landfill. Compost organic waste when possible and recycle packaging materials like glass jars or plastic containers that you no longer need. By the end of this day, you’ll have a cleaner kitchen with more space for cooking and entertaining!
Day Three: Painting Cabinets and Walls
After the decluttering phase, it’s time to roll up your sleeves and add a fresh coat of paint to those cabinets and walls. Cabinet color selection is crucial as it sets the tone for your kitchen. Opt for lighter shades to give an illusion of more space or darker hues for a bold statement. You need not stick with one color; you can blend two complementary colors or use a different shade on the lower cabinets compared to the upper ones. If you’re unsure about colors, neutrals are always safe bets – they match everything! Remember, preparation is key before painting – clean the surfaces thoroughly and sand lightly if needed.
Next, let’s tackle wall painting techniques that can elevate your kitchen without breaking the bank. One popular technique is sponge painting – it creates a textured look that hides minor imperfections on your walls. Another cost-effective option is using stencils for creating patterns or even murals if you’re feeling adventurous!
If you prefer simplicity, just go for a solid color but consider using semi-gloss paint; it reflects light well and is easier to clean than flat finishes. Whether you choose an artistic approach or straightforward painting, ensure proper ventilation in your kitchen during this process and allow enough drying time before moving onto day four of your kitchen refresh journey.
Day Four: Updating Hardware and Fixtures
Now it’s time to focus on the smaller details – updating your hardware and fixtures can make a significant impact in transforming the overall appearance of your space. First, let’s talk about hardware selection tips. Look for pulls and knobs that complement the style of your kitchen – vintage inspired, modern minimalist or rustic farmhouse, there are countless options available at affordable prices online or in home improvement stores.
Try to match these with other items in your kitchen, like stainless steel appliances or a copper sink. Don’t be afraid to mix and match either; sometimes breaking away from the norm creates a unique aesthetic appeal.
Next comes the fixture installation guide. You’ll be surprised how replacing an old faucet or light fixture can refresh your space instantly without breaking the bank. When selecting new fixtures, consider their functionality as well as aesthetics – Does the faucet have a sprayer? Is the lighting bright enough for cooking tasks?
Installation is often straightforward; you just need basic tools like screwdrivers and pliers along with some patience and attention to detail. But if you’re not confident doing it yourself, don’t hesitate to hire a professional—it’s still cheaper than an entire kitchen renovation! Remember: A little change here and there can collectively create a big difference.
Day Five: Adding Backsplash
Ready to add some pizzazz to your space? Let’s dive into day five: installing a backsplash. A backsplash can dramatically change the look of your kitchen without breaking the bank. When it comes to Backsplash Material Choices, there are plenty of budget-friendly options available. Ceramic or porcelain tiles are classic choices that come in various colors and designs. Vinyl stickers can be an even more economical choice, offering a wide variety of patterns and being incredibly easy to install.
Now that you’ve picked out your materials, let’s get to those DIY Installation Tips. First things first: ensure your wall is clean and dry before starting. Measure the area where you want to place the backsplash carefully, then mark with a pencil for guidance.
If you’re using tile, apply adhesive on the wall using a notched trowel and put up the tiles from bottom to top, keeping them straight by using spacers if needed. For vinyl stickers, just peel off the back and stick them carefully onto your wall! Remember – patience is key during this process; rushing could lead to mistakes which might ruin your new kitchen vibe!
Day Six: Incorporating New Accessories
Let’s switch gears on day six and talk about incorporating new accessories into your space. Accessories play a vital role in tying together the overall look of your kitchen, but it doesn’t mean you have to splurge on them. Choosing complementary accessories can be done on a budget if you’re resourceful and creative. Consider items like dish towels, pot holders, or even decorative plates – these small changes can make a big difference! You could also add some plants for a fresh pop of greenery.
When it comes to budget-friendly shopping, second-hand stores or flea markets are great places where you can find unique pieces at lower prices. Don’t overlook discount retailers online or locally either. They often offer trendy items at affordable prices. Think outside the box when looking for kitchen accessories – an old wooden ladder could become an unusual but stylish rack for hanging pots and pans, while vintage tins might serve as quirky storage containers for dry goods. Remember that refreshing your kitchen is all about creativity and personal expression, so don’t be afraid to mix things up!
Day Seven: Final Touches and Clean up
Wrapping up your week-long makeover mission, it’s time to focus on the final touches and a thorough clean-up. You’ve done an amazing job so far, but don’t forget that organizing kitchen tools plays a significant role in refreshing your kitchen space. Start by decluttering: get rid of items you don’t use frequently or are duplicated. Then consider investing in some affordable storage solutions like cutlery trays, pot racks, or spice organizers to keep your essentials easily accessible yet tidy.
Next up is installing window treatments. These can bring a whole new vibe to your kitchen without breaking the bank. Consider light-filtering options if your kitchen gets lots of sunlight – they’ll help prevent glare while still letting plenty of natural light in. Alternatively, choose bold patterns or colors for a fresh pop of style.
Once you’re satisfied with all the changes, take time to thoroughly clean every corner of the kitchen including appliances and cabinets inside out; nothing says “refresh”better than cleanliness! In just seven days and on a budget, you’ve managed to transform your kitchen into something more functional and visually appealing – pat yourself on the back!
Conclusion
You’ve done it! In just a week, you’ve transformed your kitchen on a budget. You didn’t need costly contractors or expensive renovations. Just some time, a bit of creativity, and elbow grease.
Remember, the most important thing is that you’ve created a space that feels fresh and new to you. It’s not about perfection but satisfaction in knowing you did it yourself. After all, there’s nothing quite like the feeling of accomplishment from a job well done.


